Creating an organization
If you work with different organizations and want to keep not only your tasks and chat separated, but your billing as well, creating another organization is the way to go. You’ll use all the same login information, but no data created in other teams will be accessible while in another organization and billing is not shared between organizations. If you want to work with other organizations but have billing remain under one plan, you may want to create a new team instead.
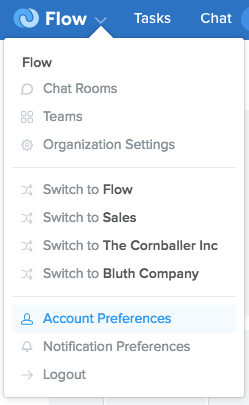
To create an organization click the v icon next to your organization name on the left side of the blue nav bar to open up the Preferences dropdown and then select “Account Preferences.”
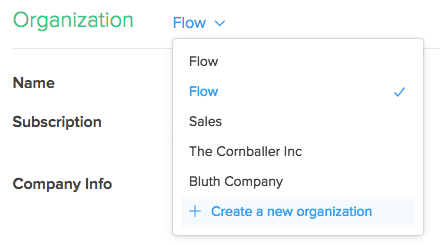
Once in Account Preferences, scroll down to the “Organization” section and click the green “Create a new organization” button if you don’t already own an organization or click the v icon next to the organization name and select “+ Create a new organization” from the dropdown menu. This will start a new organization, which means you’ll begin a new 15 day trial, after which you’ll be asked to select a payment plan.
After you’ve confirmed that you want to start a new organization, the next step is to add some more information about it. In addition to indicating the number of team members that will be joining you, you’ll name your organization - it can be the name of a company or department, like “Flow Marketing,” or something more descriptive.
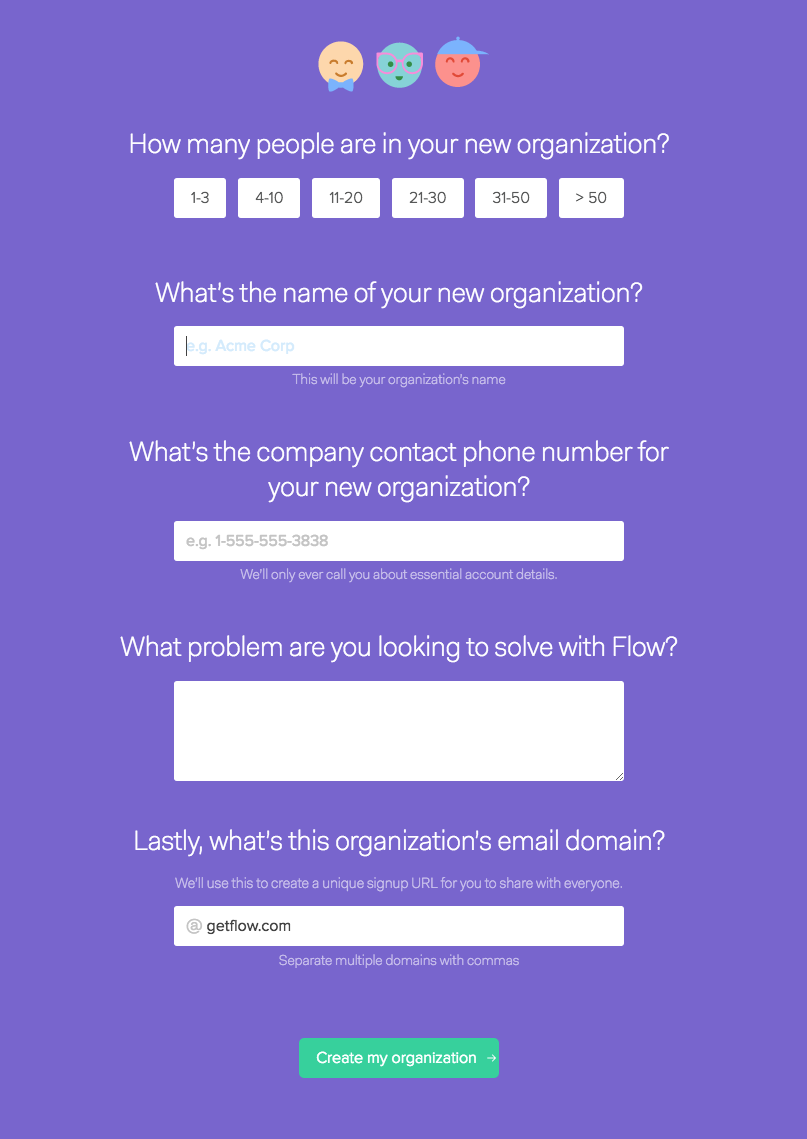
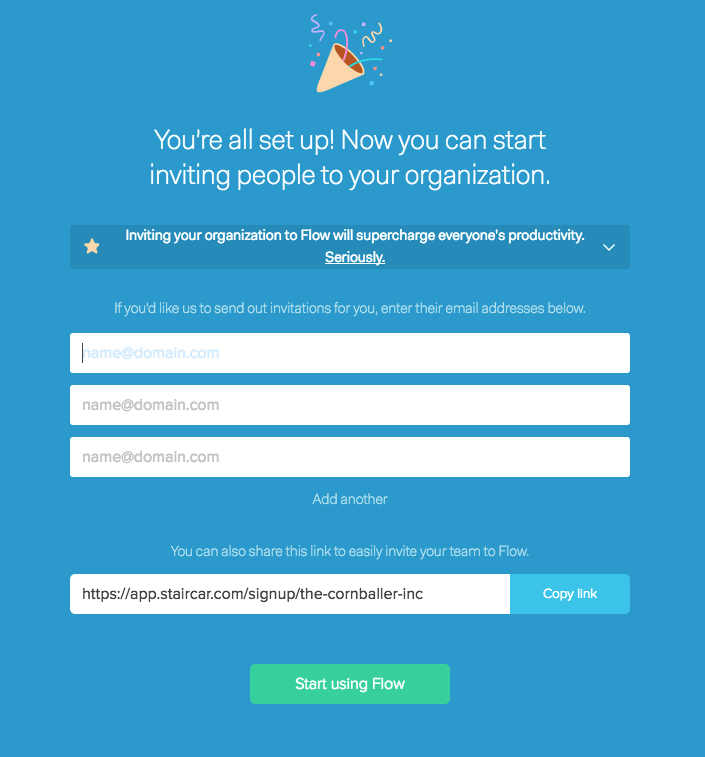
You can also use your company’s email domain to create a unique sign-up URL to share with your colleagues, or you can leave this blank if not everyone on your organization shares a domain. When you’re done, click the green “Create my organization” button at the bottom. You can then copy the sign-up URL to share with your organization, or you can invite team members using their email address. When you’re done, just click the green “Start using Flow” button.
You can at any time invite more users to your organization on the People page, directly from a team, chat or project invitation form.